-
CarryMap Builder
- About CarryMap Builder
- Installing CarryMap Builder
- Licensing
- Registering CarryMap Builder license
- Creating mobile map from ArcGIS Pro project
- Managing identification templates
- Extracting map by selected polygon layer
- Merging multiple CMF2 maps
- Converting CMF to CMF2
- Generating map reports
- Importing and exporting data in GeoPackage format
- Setting CarryMap Builder
- Support
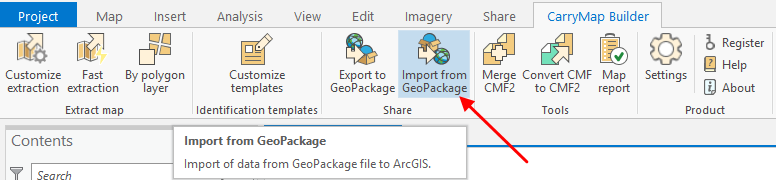
Importing GeoPackage layers to ArcGIS
To import GeoPackage file to ArGIS Pro, press Import from GeoPackage button on the CarryMap Builder tab.
|
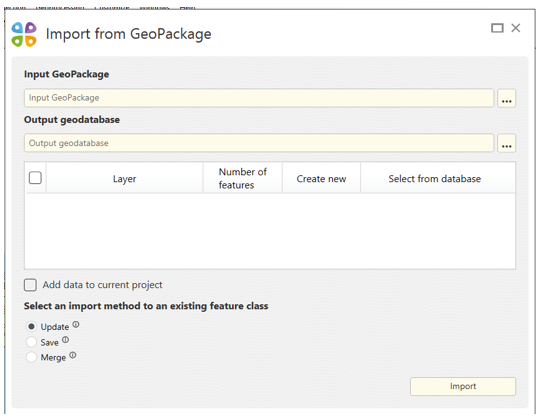
The Import from GeoPackage tool window will appear.
|
You can import GeoPackage files both to existent geodatabase with set of feature classes, or to the newly created geodatabase.
To import GeoPackage file to ArcGIS Pro, select the required GeoPackage file by pressing Browse button in the Input GeoPackage section of the tool.

|
Now select the output geodatabase. To do so, in the Output geodatabase section press Browse button and select the needed database.

|
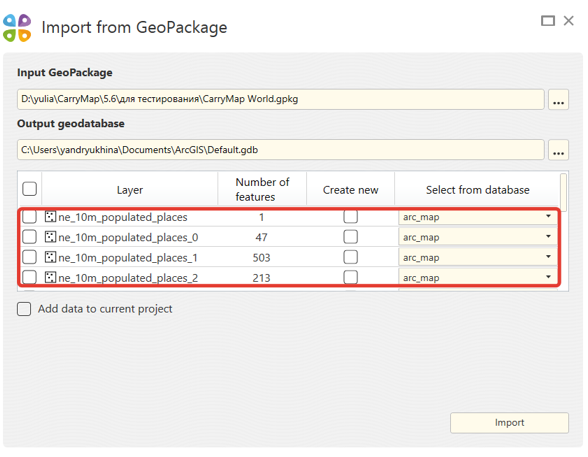
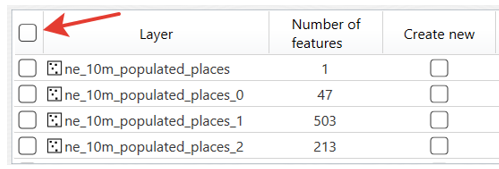
Now you need to select layers for import from the input geodatabase. The selected layers will be displayed in the window.
|
Check the boxes near the layers that need to be selected.

|
To select all layers at a time, check Select all option.
|
Now select feature classes for importing layers from the output geodatabase or create the new feature classes.
To import layer to the previously created feature class in the geodatabase, check the box near the layer and select the required feature class from the dropdown list.
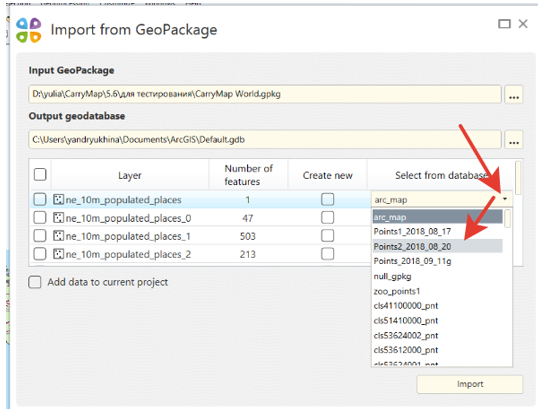
|
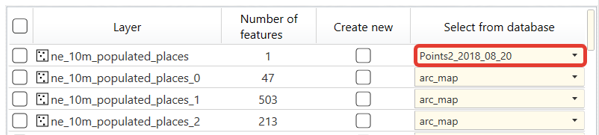
Selected feature class will be shown in the layer string.
|
Dear users, please note that attribute table of the output feature classes, where to import will be done, will be changed according to the attribute table of the imported GeoPackage files.
To import GeoPackage layer to the new feature class, check the box near this layer.

|
Feature class with the name of the GeoPackage layer will be saved in the geodatabase.
To add imported data to your current map of ArcGIS Pro project, check
![]() option.
option.
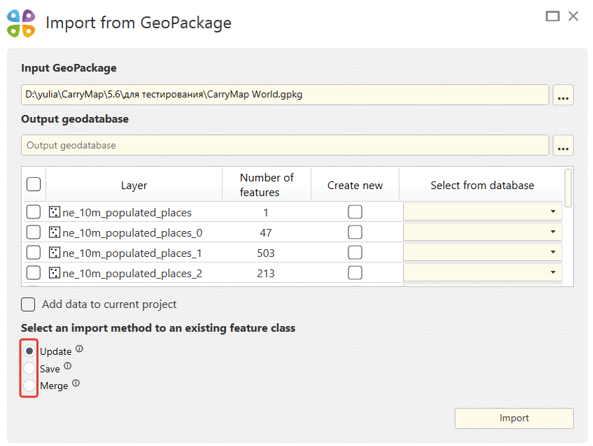
By importing to the existent feature class, one the following importing methods can be used:
- Update – only changed features are imported. By using this method the imported GeoPackage data must have completed GlobaliD field and enabled Editor Tracking mode for the Modification date field.
- Save – all features are imported and source features in the output GeoPackage file are deleted.
- Merge – all features are imported and source features in the output GeoPackage file are saved.
By default the update method is used for importing GeoPackage files.
To change the importing method, check the box near the needed method.
|
After making all importing settings press
![]() button.
button.
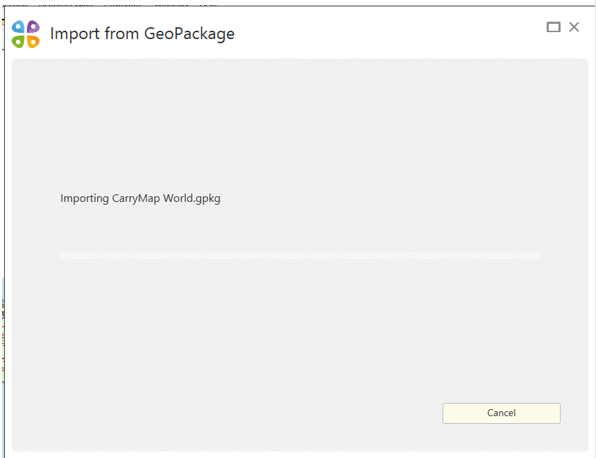
The Import from GeoPackage window will appear.
|
To cancel importing process, press
![]() button.
button.
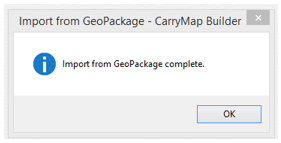
Upon import completion, the following window will appear.
|